Panduan: Masuk ke Akun Blogger Anda (Tampilan Baru), Pilih TEMPLATE lalu Edit HTML, kemudian LANJUTKAN. Ganti judul dan panduan ini dengan Judul dan Ringkasan Artikel terbaik anda
Panduan: Masuk ke Akun Blogger Anda (Tampilan Baru), Pilih TEMPLATE lalu Edit HTML, kemudian LANJUTKAN. Ganti judul dan panduan ini dengan Judul dan Ringkasan Artikel terbaik anda
Panduan: Masuk ke Akun Blogger Anda (Tampilan Baru), Pilih TEMPLATE lalu Edit HTML, kemudian LANJUTKAN. Ganti judul dan panduan ini dengan Judul dan Ringkasan Artikel terbaik anda
Panduan: Masuk ke Akun Blogger Anda (Tampilan Baru), Pilih TEMPLATE lalu Edit HTML, kemudian LANJUTKAN. Ganti judul dan panduan ini dengan Judul dan Ringkasan Artikel terbaik anda
Posted by UnknownJumat, 21 Februari 20140
komentar
Posted by Milton Burgese, Head of Education, Google Brazil
Brazil is one of the fastest-growing countries in the world, and the state of São Paulo is the economic powerhouse underneath it all. The future of this continued growth rests in the hands of its youth. The state of São Paulo has more than four million students, 5,000 schools and a community of almost 300,000 teachers and staff.
To equip future generations with the skills to succeed in tomorrow’s workforce, we are partnering with the Department of Education of the State of São Paulo to provide and deploy Google Apps for Education across the state, for free.
“We are so excited to be bringing Google Apps for Education to more than four million students of São Paulo,” said Geraldo Alckmin, Governor of São Paulo. “Finally, classes will go beyond the four walls of the school.” We are working to deploy Google Apps for Education to all 4 million students within the year.
Milton Burgese, Head of Education, Google Brazil, speaks about the partnership
The municipality of São Caetano do Sul, a thought leader across the country and known for both quality of education and life, announced this week that they are excited to be going Google at an event hosted in São Caetano. We will be deploying Google Apps for Education in 67 schools there, reaching 19,000 students and 1,500 teachers.
“I'm sure that the learning process of our children and youths will be improved by the support of new technological tools that are being brought to our schools by Google” said Paulo Nunes Pinheiro, Mayor of São Caetano do Sul.
We’ve also partnered with the Escola de Formação de Profesores (EFAP), a professional development facility, to train all of São Paulo's 300,000 teachers on the use of Google Apps for Education. Helping them master the new technology will help them communicate, collaborate and partner even better with their schools and students. As Herman Jacobus Cornelius Voorwald, the São Paulo State Secretary of Education, told us, “If we want to change our country, we must use education… We need to dedicate time to helping teachers learn by showing them different ways to embrace technology.”
We believe in the power of the web to help people discover, connect, and learn. And we’re thrilled to see Sao Paolo and São Caetano do Sul join Malaysia, the City of Boston and a growing number of other forward-thinking districts around the world who are embracing the web and technology to drive a new, better future for our students.
Posted by UnknownKamis, 20 Februari 20140
komentar
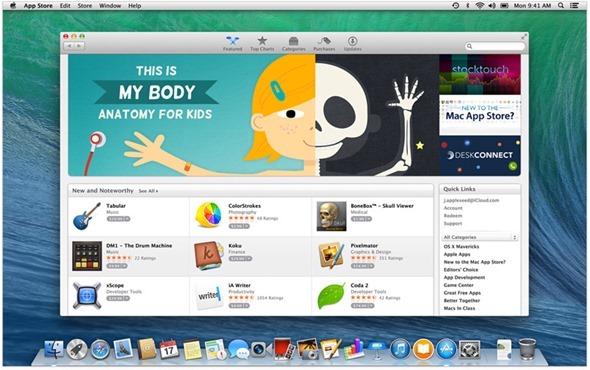
Want to install Mac OS X Mavericks Hackintosh on your PC? Thanks to the latest UniBeast release which adds support for Mavericks, you can now have best of both worlds (Windows and Mac) on your Intel-based PC.
The following guide will help you install OS X Mavericks v10.9 on your PC.
Requirements:
Access to Mac for downloading OS X Mavericks from MAS and creating UniBeast drive.
8GB+ USB flash drive.
An Intel based PC capable of running Mavericks.
Guide on how to install OS X Mavericks Hackintosh on your PC:
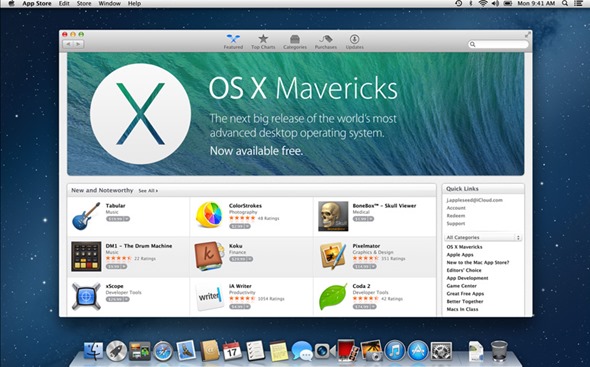
Step 1: On your Mac, download OS X Mavericks for free from the Mac App Store. Make sure the downloaded installation file is in /Applications folder.
Step 2: Download the latest version of UniBeast and MultiBeast from here.
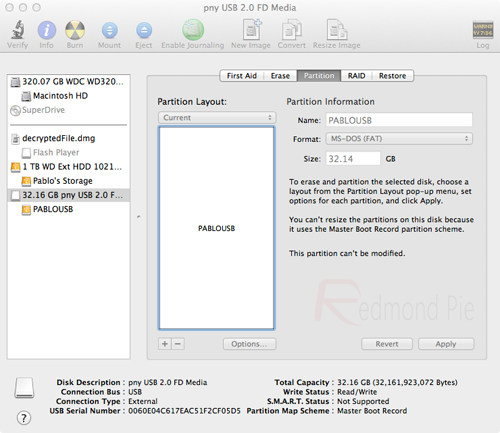
Step 3: Format your USB flash drive using Disk Utility on Mac with the following settings:
Start Disk Utility on Mac. Select your USB drive from the left hand column.
Select the Partition tab from the right side. Click on Current dropdown menu and choose1 Partition.
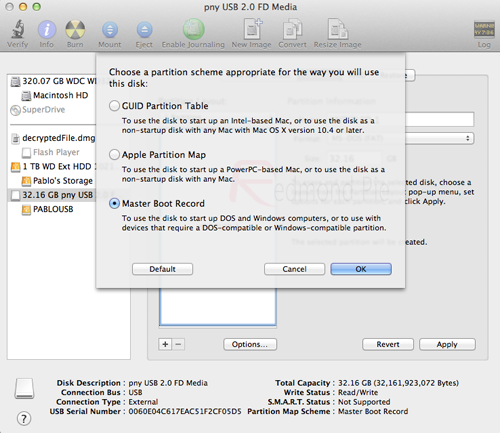
Now click on Options… button, select Master Boot Record.
Type ‘USB’ as the Name for the drive. Select Mac OS Extended (Journaled) as Formattype.
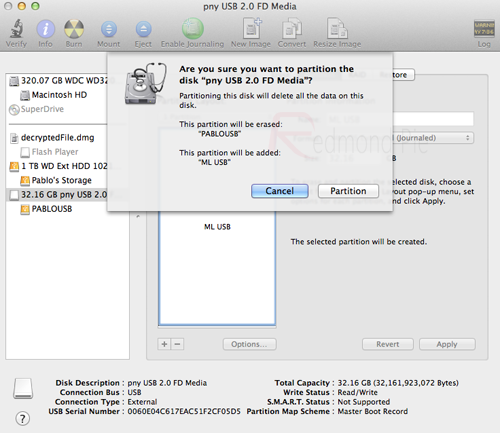
Once done, click on Apply followed by Partition.
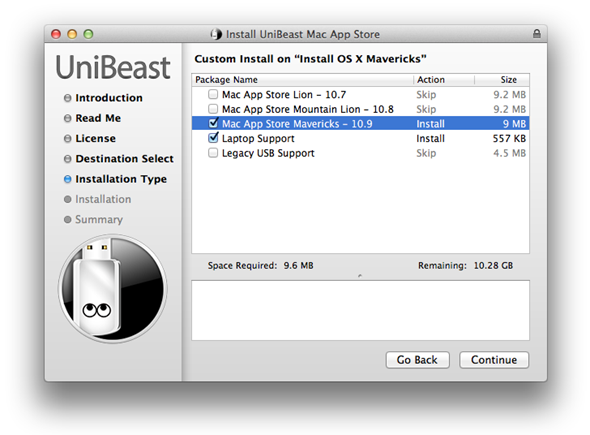
Step 4: Now start UniBeast that you downloaded in Step 2 above.
Step 5: Skip through the first few screens by clicking Continue or Agree, until you get toDestination Select screen.
Step 6: Select your USB drive and click Continue to proceed.
Step 7: On Installation Type screen, make sure Mac App Store Mavericks – 10.9 is selected in packages. Additionally, select Legacy USB Support if you are using an old system with Socket 1156. Select Laptop Support package if you are installing it on a notebook PC. Once done, clickContinue, enter admin password for your Mac if prompted, and let UniBeast make a bootable Mavericks hackintosh USB flash drive for your PC.
Once done, move MultiBeast file that you downloaded in Step 2 above to this bootable Mavericks hackintosh USB drive (you will need this later).
Step 8: Now insert this bootable Mavericks hackintosh drive in your PC. Make sure the BIOS is set to boot the system from USB devices. When you boot from the USB drive, you will see Chimera boot screen, select “USB” and hit Enter on keyboard to continue.
Step 9: Once you are into OS X installer, you need to format the HDD you want to install Mavericks to using Disk Utility with the following settings:
On the menu bar, click on Utilities, then start Disk Utility.
Select the HDD you want to install OS X to from left hand side.
From right side, click on Partition tab, then click on Current dropdown menu and choose 1 Partition.
Now click on Options… button, choose GUID Partition Method.
Type ‘Macintosh HD’ as the Name for HDD. Select Mac OS Extended (Journaled) asFormat type.
Click on Apply followed by Partition to partition the drive.
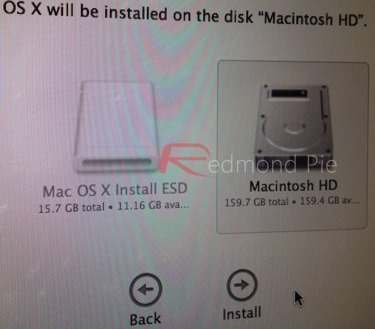
Step 10: Once done, close the Disk Utility program, go back to the installer. Select “Macintosh HD” as the drive you want to install OS X to.
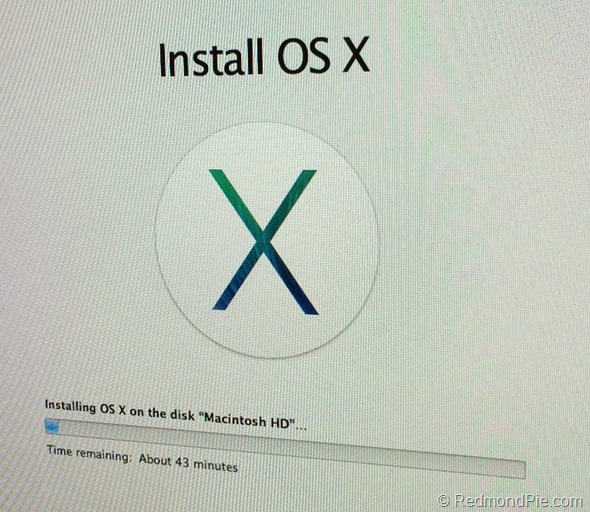
Click on Install for the installation to begin.
You’re almost there! Once the OS X installation is complete, you need to make this HDD bootable. This can be done using MultiBeast utility. MultiBeast can not only make OS X HDD bootable, but can also install the required drivers for audio, WiFi, graphics, LAN and more.
Step 11: Reboot your system again using the bootable Mavericks hacktintosh flash drive. From the Chimera boot screen, select “Macintosh HD” this time.
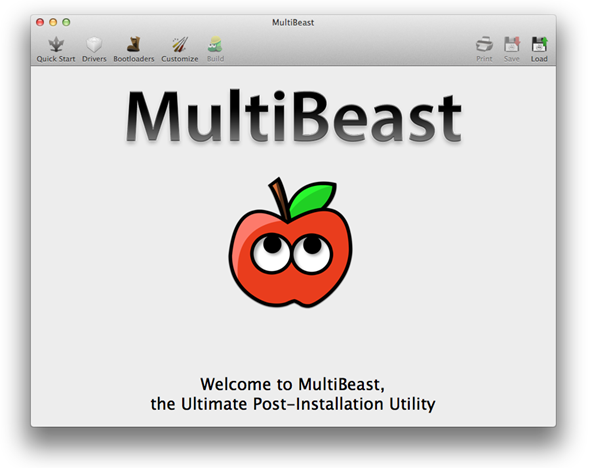
Step 12: Start MultiBeast, from here, choose all the drivers required for your PC. Once done, click on Build followed by Install to complete the installation.
That’s it! You now have fully working OS X Mavericks installed on your PC.
Surprise surprise. This is just in. Team Evad3rs has just released untethered Evasi0n iOS 7 – 7.0.4 jailbreak for the latest iPhone, iPad and iPod touch devices.
Available for both Windows and Mac users, Evasi0n iOS 7 jailbreak works on all iPhone, iPad and iPod touch models running iOS 7.0, 7.0.1, 7.0.2, 7.0.3 and 7.0.4.
This includes:
iPhone 5s
iPhone 5c
iPhone 5
iPhone 4S
iPhone 4
iPad 2
iPad 3
iPad 4
iPad Air
iPad mini
iPad mini 2
iPod touch 5
We will be back with full how-to tutorials. Those of you who want to jailbreak right away can do so by downloading Evasi0n from official website at Evasi0n.com or through the links given below.
Update x1: This release has also caught Saurik, the founder of Cydia, by surprise. He has clarified it on Twitter that the Cydia build included in version 1.0 of Evasi0n 7 isn’t official, and hence will be prone to bugs. Tweaks relying on Substrate will have issues with this early release of Evasi0n. This issue will be fixed in later versions of Evasi0n 7.
Update x2: Evasi0n 7 is also compatible to work with iOS 7.1 beta 2.
Update x5: Evasi0n has been updated to version 1.0.1, removing the TaiG App Store completely. The download links above have been updated.
Update x6:Evasi0n 7.x Untether 0.2update now available on Cydia, bringing Evasi0n 1.0.1 features to Evasi0n 1.0 users.
Update x7: Download links for Evasi0n embedded above have been updated to the latest version 1.0.2. This version adds fix for iPad 2 stuck at boot loop issue.
Update x8: Apple released iOS 7.1 beta 3 recently. Fortunately, the exploits used in Evasi0n7 still work on the latest beta of iOS 7.1. An unofficial version of Evasi0n7 is now available that lets youjailbreak iOS 7.1 beta 3untethered on all the devices.
Update x9: Evasi0n 1.0.4 is out with important security patches related to untether, as well as a fix for reboot loop issue on Retina iPad mini. The download links of Evasi0n above have been updated.
Update x10: New version 1.0.5 of Evasi0n is out. Adds support for the latest iOS 7.0.5 firmware which Apple released recently for iPhone 5s and iPhone 5c. Download links for Evasi0n jailbreak tool have been updated.
You can follow us onTwitter, add us to your circle onGoogle+or like ourFacebook pageto keep yourself updated on all the latest from Microsoft, Google, Apple and the web.
I don't buy into the iPad as a laptop replacement—not quite. But it is fantastic at tapping into your computers to access video and audio, documents, and even your full desktop, remotely. Here's how.
The iPad is first a foremost a device for consuming media, and where is most of your media if not on your desktop or laptop? All your videos, both self-created and downloaded; your music collection, which is so much larger than your iPad's flash storage can dream of accomodating; your store of documents, which contain so much information about you, your work and your interests. On your iPad, this stuff is too often there, not here—but it doesn't have to be.
You can easily access all of these things from your iPad with a set of simple-to-use apps, and where those don't work, you can actually control your computer—mouse and all—from your iPad. Here's what you need:
Audio and Video
Audio and video streaming on the iPad is, for the time being, the domain of two apps: Air Video and StreamToMe. They're extremely similar, sharing their $3 price, iPhone compatibility, and an underlying video conversion library, but a few key differences will determine which one you need to download. So!
If you...
• Have a Windows PC • Don't need to stream audio • Tend to store your content in h.264/mp4 files
Go with Air Video. It's a wonderful app, which lets you stream video—even in formats not natively supported by the iPad—both locally and remotely (with simple port forwarding), and which has both Mac and PC server software. It's flexible as well, giving you precise control over streamed video quality, and options for either transcoding video live, or pre-converting it before streaming.
SEXPAND
h.264 playback, even in HD, seemed cleaner and bit smoother than in StreamToMe, so if you've ripped or downloaded most of your content in that format, Air Video is a slightly better choice. It transcodes your downloaded .avi file beautifully, too.
(Note there currently isn't a good DLNA streaming app, though once its bugs are worked out, PlugPlayer shows promise. For the time being, Air Video is the only way to stream and transcode your video library stored on a Windows PC)
If you...
• Have a Mac • Want to stream audio files as well
Then you should download StreamToMe. It too can transcode video in real time, so you don't need to worry about converting your home video files or P2P downloads. Its main advantage over Air Video is that it can stream audio. It'd be nice if the app had an iTunes-style artist view, but if your iTunes music folder is organized by artist name and album title (if you haven't told it to do something else, iTunes will have taken care of this for you), navigating through and playing songs is pretty straightforward.
SEXPAND
The setup routines for both apps are nearly identical. Each requires a server app to be run on your computer, which needs to be pointed to your video library, and each will automatically recognize your computer over a local network. For remote streaming, each app provides guidance for which ports to forward on your router. (For instructions for your specific router, check here.) This means you can stream your home video from anywhere—work, a hotel room, whatever—over Wi-Fi.
Documents
Document sharing on the iPad isn't particularly easy, relying on the awkward iTunes file sharing system, which only lets you access documents in the app they've been flagged for. To browse apps in a more useful way, you'll need get an app called GoodReader. Its $1.
SEXPAND
GoodReader is an app that enables you to connect to all kinds of file servers, be they cloud-based (Google Docs, Dropbox, or MobileMe) or local (an FTP or WebDAV server). Once connected, GoodReader lists files that can be read on a given server, which are left up to the iPad's inbuilt viewers to display. This means that Word, Excel and PowerPoint documents, as well as a range of other text files, images, and even audio files, can be opened in the app.
SEXPAND
One of the most compelling features of GoodReader is that it can turn your iPad into a local file server, which you can mount and connect to from any Mac or PC. This feature lets you drag and drop your documents to the iPad, as if it were a NAS device. (GoodReader also shows up in the iTunes USB file transfer dialog, but Wi-Fi drag-and-drop transfer is much faster and easier, once it's set up.) Instructions for server setup are available here.
Additionally, using the app's "Manage Files" pane, you can sort, administer and email your documents as well. It's basically like having a disk for all kinds of media, on your iPad, along with a file browser. Ha!
Controlling Your Desktop
If you want full access to your computer, video, audio and document file servers won't be enough. What about your applications? Your iPad-incompatible files? Your entire desktop? To get that kind of control, you need to use VNC.
From our previous How To guide on the subject:
VNC (virtual network computing) is one of those tricks that never gets old, and having it set up can often save your ass-whether you left some info on your home computer that you need at work, want to check on your massive BitTorrent queue to schedule the evening's entertainments, or help your poor parents use clip art in Microsoft Word, having remote access can be handy dandy.
For full setup instructions for Windows and OS X, follow our guide here.
Once you've done that, you'll need an iPad VNC client. The iPad App Store already has a handful of VNC apps available for download. The ones I'd go with are Mocha VNC Lite (a free, limited-capability app), and if you find you like the VNC concept, the $12 Desktop Connect.
SEXPAND
It's strange, controlling a mouse-based computer from a touchscreen device, but there's one option I've found makes life a lot easier: In Desktop Connect, turn Touchscreen Mode off. This options has you control the mouse as if the whole touchscreen is a trackpad, rather than having to guide the mouse directly with your finger. After a few minutes, you'll be clicking around Windows or OS X without thinking about it.
Posted by UnknownSelasa, 18 Februari 20140
komentar
HTC confirms the Desire 8
HTC has confirmed that it will unveil the Desire 8 on February 24th in Beijing.
In a posting on its official Weibo page, the Taiwanese company said that it will show off its mid-range Desire 8 smartphone for the first time next week. Details of the smartphone leaked last week. It had been thought that the company would use Mobile World Congress to launch the smartphone – possibly alongside the HTC M8. However, the Weibo post suggests that the Desire 8 will instead make its debut in China. The company refused to provide any details about the phone beyond confirming its name and that it will debut next week.
Previous rumours have suggested that the phone will feature a 5.5-inch screen with a 1.2GHz quad-core Qualcomm Snapdragon 400 processor, 1GB RAM, a 13 megapixel rear facing camera and a five megapixel front facing camera. It is also said to be coming with 8GB of storage, front-facing speakers – like the HTC One – and be available in a range of colours. It is also expected to run Android KitKat. The phone is said to be being launched in China, Europe, Africa, the US and Asia. There s no word on whether the phone will make it to the rest of the Americas and Australia. Source:LlabTooFer
It seems that we finally know the date – 25.03.2014 looks like the day when HTC will launch their new flagship device and the HTC One (M7) successor – HTC One M8 which is rumoured to be called "HTC One+" or "HTC One 2" or just " HTC One (M8)".
Have any questions or comments? Feel free to share! Also, if you like this article, please use media sharing buttons (Twitter, G+, Facebook) below this post!
Posted by UnknownMinggu, 16 Februari 20140
komentar
Once in a while, a software bug in the kernel will cause a random reboot, so in order to help kernel developers to fix and troubleshoot the reboots, a kernel log need to be submitted to the developer for further analysis and hopefully lead to a bug fix.
Most Android kernels have "RAM Consoles" to save the necessary kernel logs immediately after reboot in the RAM. The users can then retrieve this RAM log on a subsequent reboot to submit to kernel developers. Here is a quick tour on how to do that.
[ Using ADB ]
adb shell
su
cat /proc/last_kmsg > /sdcard/last_kmsg.txt
exit
exit
adb pull /sdcard/last_kmsg.txt
File last_kmsg.txt will be located in the same location as adb.exe executable.
[ Using android terminal app ]
su
cat /proc/last_kmsg > /sdcard/last_kmsg.txt
exit
exit
adb pull /sdcard/last_kmsg.txt
File last_kmsg.txt will be located on your SD-card.
[ Using Root Explorer / ES Explorer with Root ]
go to /proc folder
copy last_kmsg to /sdcard/
rename last_kmsg to last_kmsg.txt
File last_kmsg.txt will be located on your SD-card.
The best method to share the last_kmsg.txt content is to upload it to pastebin.com and send a link to the developer.
Have any questions or comments? Feel free to share! Also, if you like this article, please use media sharing buttons (Twitter, G+, Facebook) below this post!