Tampilkan postingan dengan label Firmwares. Tampilkan semua postingan

How To Upgrade OS Android Samsung Galaxy Fit from Froyo to Gingerbread?

Posted by Unknown Rabu, 11 Desember 2013 0 komentar
Upgrade OS Android

How To Upgrade OS Android Samsung Galaxy Fit from Froyo to Gingerbread?


Since you do not understand everything about how to upgrade the OS to Android, the post I will discuss on How to Upgrade OS Android Samsung Galaxy Fit from Froyo to Gingerbread?

What is OS? OS is an Operating System that is used on a device, such as Android we are discussing today. In addition to Android there are also Windows, Linux, etc. that I can not mention one by one. Well, but is it possible for us to upgrade it? What's own upgrade? Upgrade is a step in which we will enhance the ability of the OS we are using today to a newer operating sysytem, in this case I upgrade from OS Froyo to Gingerbread for Samsung Galaxy Fit S5670.

Steps Upgrade OS Android Samsung Galaxy Fit from Froyo to Gingerbread:
1. Prepare in advance the tools we need. As ODIN Multidownloader, File .ops, and firmware that we use.
2. If you do not already have it, please download ODIN Multidownloader and file .Ops for Samsung Galaxy Fit here
(for file .opsnya different for each device's). For the firmware you can find yourself well. Here I only explain a few steps alone.
3. After you download all the equipment, first open your Multidownloader ODIN. Then insert the file .Ops in place, and check One Package (if you use the One Package, if not leave it alone).
4. Then Enter the firmware into place, (File firmware berkestensi. Tar, if still in the first extract rar please.)
5. Then once everything is ready, plug the phone.
Download your favorite Android in by pressing the Mode Down, Home, Power simultaneously. After appearing in yellow on the upper left Multidownloader ODIN and it was a sign already detect it, please click on START
6. Never unplug the cable from your computer, because it would thwart the upgrade process and the risks that occur on their own responsibility.
7. Wait until the process is complete. Highlighted in yellow on the upper left ODIN became blue. Completed.

Baca Selengkapnya ....

(ROM) : Firetrap Jellybean v2.2.2

Posted by Unknown Kamis, 05 Desember 2013 0 komentar
Custom ROM for Optimus Boston,Moto Xt502, Spice Mi 300, Apanda A60, Gigabyte G1305, etc.


CHANGELOG:
----------------------------- Android OS version: 2.2.1
ROM --------------------------------------- Name: Jellybean
Rooted (unsecured boot.img )--------------------: YES
Rooted (su + Superuser.apk )--------------------: YES
------------------------------ BusyBox installed: YES
BusyBox ---------------------- run-parts support: YES
/ Data / app ------------------------------ enabled: NO
Custom boot animation ------------------ allowed: YES (firetrap)
Nano text editor --------------------- installed: YES (firetrap)
Bash shell support -----------------------------: NO
/ System / framework is deodexed ------------------: YES
/ System / app is deodexed ------------------------: YES
Zipalign all *. apk files to optimize RAM usage-: YES
Added Task killer for speed tweak --------------: YES
------------------------------------------ GAPPS: YES
----------------------------------- RootExplorer: YES
JIT --------------------------------------------: YES (firetrap / flph)
-------------------------------------- Dpad_Wake: NO
------------------------------------- Reboot_APK: YES (firetrap)
--------------------------- Performance_Increase: YES (firetrap / flph)
----------------------------------------- App2SD: YES (flph)
------------------------------- GPS_Optimization: YES (flph)
------------------------------------ FULL_MARKET: YES (flph)
En_US ------------------------------------------: YES (flph)
NEW_DIALER/CONTACTS----------------------------: YES
---------------------------------- MAPS_ROTATION: YES (firetrap)
GINGER_LAUNCHER CUSTOM_WALLPAPERS -------------- +: YES (firetrap)
WIFI_CHANNELS 11----------- --------------------: = YES (flph)
-------------------- SENSOR_ON_CALL_OPTIMIZATION: YES (firetrap)
WIFI_SCAN_INTERVAL 90----------- ---------------: = YES (firetrap)


Download : JELLYBEAN V2.2.1

Download : Jellybean + + app2SD DalvickCache on phone

Download : Software required to install the ROM:


After Succesfully installing this rom

Download : 2.2.2 Update

and Install this update from recovery


Baca Selengkapnya ....

How to download Samsung’s Galaxy S4 Manual

Posted by Unknown Sabtu, 30 November 2013 0 komentar

galaxy s4 manual
Are you looking to get your hands on Samsung’s Galaxy S4 manual without buying the smartphone or borrowing it from a friend? There are numerous places on the Internet to find it for free.
In the U.S., you can find the Galaxy S4 manual in English and Spanish on Samsung’s own website for:
To download the manual(s), just hit the link for your corresponding carrier above, click “See all Downloads”, and hit the “Manuals” tab. From there, hit the PDF button for the Spanish or English manual, and once the manual is downloaded, a small overlay will pop up at the bottom right corner of your screen. Next to the print icon on the overlay is the save icon. Hit that to save it to your computer.
Samsung also has Galaxy S4 manuals in a variety of other languages on their website, including French, Russian, Japanese, Chinese, German, and Spanish.
Click the link for your corresponding language, and as mentioned above, once the page loads, a small overlay will appear at the bottom right of your screen. Right next to the print icon on the far right of the overlay is the save icon. Click that to save the Galaxy S4 manual to your computer.
For the few people that own an Exynos 5 (Octa core) version of Samsung’s flagship, you can find the Galaxy S4 manual here.

Baca Selengkapnya ....

How to manually install Android 4.4 KitKat – Nexus 7 (2012/2013) WiFi, Nexus 10 (Update: Nexus 4 and Nexus 7 3G/4G links too)

Posted by Unknown 0 komentar
sAndroid 4.4
Updated with links to the OTA zip files for the Nexus 4 and Nexus 7 (2012/13) mobile data models. You can find them at the bottom of the article.
After hearing that Android 4.4  KitKat would be rolling out to the Nexus 10 and WiFi variants of the Nexus 7 (2012/2013), many of us jumped to check to see if we’d receive the update. Unfortunately, Google tends to take its time updating devices and we could be in for a rather lengthy wait.
As Android enthusiasts, you know we couldn’t simply wait to try all of that KitKat, and luckily there’s a method to install Android 4.4 KitKat onto your device manually using ADB sideload. Here’s a step by step guide (with images!), to help you manually download and install Android 4.4 KitKat onto your Nexus tablet. (Wifi variants only).
Android Authority takes no responsibility for what may happen to your device. While this is a reasonably safe procedure, you continue at your own risk. This procedure is recommended to intermediate and advanced Android users.

What you need

  • A WiFi variant Nexus 7 (2012 or 2013) or Nexus 10 with drivers installed.
  • A microUSB cable
  • Windows PC/Linux/Mac
  • Running the latest variant of Android 4.3 with the build number “JSS15R” for the Nexus 7 (2013), “JWR66Y” for the Nexus 7 (2012) and Nexus 10. (must be running the stock ROM, not a custom one)
  • The latest version of the Android SDK (which can be found here).
  • Zip file containing the Android 4.4 file for your tablet. Click here for the file for the Nexus 7 (2012). Click here for the link for the Nexus 7 (2013). Click here for the Nexus 10 file. (All files are from Google servers and are completely safe)
  • Make sure that if you’re using a laptop it is connected to a power point or at the very least fully charged. Ensure your tablet is also fully charged.
  • Optional: Create a backup of your data before you begin.
This method will not clear data, and you shouldn’t lose any of your app data or settings.

How to flash the update

1. Make sure you have a microUSB cable at hand, as well as a PC or Mac, and are running the latest Android 4.3 version. Also make sure that you’ve already downloaded the Android SDK, as well as the Android 4.4 update zip file for your respective device and have all of your drivers installed.
IMG_3198
2. Go to Settings>About Phone>Click on build number seven times until the message “You are now a developer” appears. Exit from “About phone” and scroll down and find the “Developer Options” setting. Click on this and then enable USB debugging.
IMG_3207
2 (b). Connect your tablet to your computer and a warning should pop up with the computers unique RSA number asking if you want to connect to the computer. Click “Always connect to computer” and accept. Then disconnect the USB cable from the computer. Now turn off your device.
3. Return to your computer and unzip the Android SDK that you should have already installed (if not return to the “what you need” section and make sure you’ve completed all of the steps before returning).
4. Find the zip file containing the Android 4.4 update and rename it to something easy like “Kitkat”. Then move the file to the Android SDK in the folder titled “Platform tools”. (This will make things easier when using the command prompt).
5. Return to your tablet and power it back on by holding Power and Volume down buttons at the same time. You will now be faced with the fastboot mode.
IMG_3210
Fastboot Mode.
6. Click the volume up button until you see the words “Recovery mode”. Press the power button to accept. It will show the Google logo and then you’ll be greeted by an Android with an exclamation mark and the words “no command written”. Use the micro USB to connect to your computer.
IMG_3227
Recovery mode
7. Hold the
homepower button down first, then quickly hold the volume up button while still holding down the power button (this is a little difficult and you’ll need to work on your timing before getting it right). You will then see this:
IMG_3230
8. Use the volume down button to go down to “apply update from ADB” and hit the power button to accept. You will then see this:
IMG_3236
9. (Almost done!) Now return to your computer for the final steps. Open the folder containing the Android SDK and open the “platform-tools” folder. If you’re using Windows Vista/7/8, hold shift and then right click on any empty space. You’ll see the option “Open command window here”. If you’re using Linux or OSX or Windows XP open a command prompt and then navigate to “platform-tools”.
IMG_3233
Windows 8 command prompt window.
10. In the command window type the following command “adb sideload Android KitKat”, without the quotation marks and substituting Android KitKat for whatever you named the zip file containing Android 4.4 for your device. Edit: Remember to add the extension “.zip” to the end of the file name for the zip file.
11. If you’ve done everything correctly, you can now sit back and watch your device install the update itself, if not head to the troubleshoot section to see some of the problems you could be facing.
IMG_3246
12. One the update has been installed, you’ll see the counter hit 100% and you can now boot up your device. Voila! KitKat chocolaty goodness for your Nexus tablet!
Android 4.4 KitKat logo - aa
Remember that you will lose root by using this method. Also remember that the update does not bring the new Google launcher with “Ok Google” and swipe left for Google Now functionality.

Troubleshoot

  •  If your device isn’t being read try another USB port or perhaps another USB cable.
  • If it still isn’t being read, try uninstalling and reinstalling the drivers for your tablet.
  • If that doesn’t work try manually installing the drivers by following this link to download the universal drivers for your tablet. Unzip the downloaded folder, then simply open your device manager and manually install the update by right clicking on your device and click “update device” then in the pop up window “browse folders” and find the folder that you just unzipped and install the drivers.
  • If that doesn’t work, my final method is to use PdaNet. The program is normally used to tether your smartphone to your computer, however it also works very well helping you install the drivers for your device. Follow this link to install the program on your computer. You can always uninstall the program once you are done using it.
  • If you are stuck in a boot loop you may need to go back into recovery and clear cache and if that doesn’t work you’ll have to factory reset (loss of all data, so remember to back up folks!). Luckily these measures are very rarely necessary.

Update! (Links for Nexus and 3G/4G Nexus 7 models)

UPDATE: Here are the links for the rest of the Nexus devices eligible to get the Android 4.4 update.

Nexus 4:

Android 4.4 KRT16S from Android 4.3 JWR66Y 
Android 4.4 KRT16S from Android 4.4 KRT16O

Nexus 7 (2012) 3G:

Android 4.4 KRT16S from Android 4.3 JWR66Y
Android 4.4 KRT16S from Android 4.4 KRT16O

Nexus 7 (2013) 4G:

Android 4.4 KRT16S from Android 4.3 JLS36I
Just choose the correct zip file for your respective device and download it, and then continue with the instructions already provided. Just like the other links, this method won’t make you lose any data. Also, for those of you who were asking, this method differs from the factory images method as it doesn’t require you to have your bootloader unlocked, and it won’t lose any data. It’s also a little easier than the factory images method for the same reasons.
Have you used ADB sideload to push the Android 4.4 KitKat update to your Nexus tablet or are you waiting for the official OTA? What do you think of Android 4.4 KitKat?

Baca Selengkapnya ....

How to Root Galaxy S4 I9500 on Android 4.2.2 XWUBMG5 Jelly Bean Firmware

Posted by Unknown Kamis, 28 November 2013 0 komentar

The Exynos 5 octa-core variant of Samsung Galaxy S4 (GT-I9500) has received a new software update with firmware build number I9500XWUBMG5. The new software update is still based on Android 4.2.2 Jelly Bean version and now available in India, Nepal, Sri Lanka, and Bangladesh.

Samsung Galaxy S4 I9500 users who have already updated their devices with Android 4.2.2 XWUBMG5 Jelly Bean, may root their devices using the tutorial below.

This tutorial uses CF-Auto-Root file released by recognised XDA Developers, Chainfire. The CF-Auto-Root file allowing Galaxy S4 users to root their devices easily without depending on the firmware. It completely supports Android 4.2.2 Jelly Bean and future firmware as well. Head over to the CF-Auto-Root main thread to learn more about the root method.

Disclaimer: Rooting voids the warranty of your device. We and the developer of this rooting procedures shall not be held responsible if any undesirable outcomes may happen to your device. use of this root guide is solely at your own risk!

Pre-requisites
1. Install USB Drivers for Samsung Galaxy S4 on the computer.
2. Enable USB Debugging Mode on the phone by navigating to Settings >> Developer Options.
3. Make a backup of all your important data before following the guide.
4. The Galaxy S4 should be factory unlocked and not locked to any particular carrier.
5. Ensure the battery of the phone is charged more than 80 per cent.
6. The CF-Auto-Root file works only on Samsung Galaxy S4 I9500. Applying this to any incorrect variant might brick the device. Verify the model number of the Galaxy S4 by navigating to Settings >> About Phone.

File Required
1. CF-Auto-Root for Galaxy S4 I9500 (CF-Auto-Root-ja3g-ja3gxx-gti9500.zip)
2. Odin 3.07

Steps to Root Galaxy S4 I9500 Running on Android 4.2.2 XWUBMG5 Jelly Bean Firmware
Step 1: Extract CF-Auto-Root and Odin 3.07 files using winrar/7zip/winzip or any other extracting tool.
Step 2: Switch off the Galaxy S4. Then boot the device into Download Mode by pressing and holding Volume DownHome and Power buttons together until a construction Android robot icon with a warning triangle appears on screen. Now press the Volume Up button to enter Download Mode.
Step 3: Launch Odin on the computer as an Administrator.
Step 4: Connect the Galaxy S4 to the computer using USB cable while it is in the Download Mode. Wait until Odin detects the device. When the device is connected successfully, the ID: COM box will turn blue with the COM port number. Additionally, the successful connected will be indicated by a message saying Added.
Note: If the Added message does not appear, then try re-install USB drivers or changing the port on the computer.
Step 5: In Odin, click the PDA button and select the CF-Auto-Root-ja3g-ja3gxx-gti9500.tar.md5 file.
Step 6: Verify that Auto Reboot and F.Reset Time checkboxes are selected in Odin. Also, ensure the Re-Partition option is not selected.
Step 7: Double-check and click Start in Odin. The installation process will now begin.
Step 8: Once the installation process is completed, your phone will restart and soon you will see a PASS message with green background in the left-most box at the very top of the Odin. You can now unplug the USB cable to disconnect your device from computer.

Samsung Galaxy S4 I9500 running on Android 4.2.2 XWUBMG5 Jelly Bean firmware is now rooted successfully. You can now install any app that requires root permission. Verify the root status of the device by downloading Root Checker app from Google Play Store.

Thank's to all fellas at XDA who first tried out this rooting technique. This method was originally posted via XDA-Developers original thread.

Baca Selengkapnya ....

How to Update Galaxy S4 I9500 with Android 4.2.2 XXUBMG9 Jelly Bean Official Firmware

Posted by Unknown 0 komentar

Samsung has recently started rolling out its latest Android 4.2.2 Jelly Bean update with base firmware XXUBMG9, for the Exynos 5 octa-core variant of Galaxy S4 (GT-I9500). The new official firmware is currently available as an Over-The-Air (OTA) update as well as through Samsung KIES.

Firmware details
PDA: I9500XXUBMG9
CSC: I9500OJVBMG9
MODEM: I9500XXUBMG9
Version: Android 4.2.2
Built date: Jul 11, 2013
Regions: Turkey, Iraq, Saudi Arabia, United Arab Emirates, Algeria, Iran, Tunisia, Morocco

Samsung Galaxy S4 I9500 users who missed the OTA update notification or unable to access the update over Samsung KIES, may follow our step-by-step guide to install the update manually.

Pre-requisites
1. Install USB Drivers for Samsung Galaxy S4 on the computer.
2. Enable USB Debugging Mode on the phone by navigating to Settings >> Developer Options.
3. Make a backup of all your important data before following the guide.
4. The Galaxy S4 should be factory unlocked and not locked to any particular carrier.
5. Ensure the battery of the phone is charged more than 80 per cent.
6. The Android 4.2.2 XXUBMG9 Jelly Bean firmware is compatible only with Samsung Galaxy S4 I9500. Applying this to any incorrect variant might brick the device. Verify the model number of the Galaxy S4 by navigating to Settings >> About Phone.

File Required
1. Android 4.2.2 XXUBMG9 Jelly Bean Firmware for Samsung Galaxy S4 I9500
2. Odin 3.07

Steps to Update Galaxy S4 I9500 with Android 4.2.2 XXUBMG9 Jelly Bean Firmware
Step 1: Extract Firmware zip file using winrar/7zip/winzip or any other extracting tool, you will get a .tar.md5 file and some other files.
Step 2: Extract Odin zip file and you will get Odin3 v3.07.exe along with few other files.
Step 3: Power off your phone.
Step 4: Boot the device into Download Mode by pressing and holding Volume Down, Home and Power buttons together until a construction Android robot icon with a warning triangle appears on screen. Now press the Volume Up button to enter Download Mode.
Step 5: Run Odin on the computer as an Administrator.
Step 6: Connect the Galaxy S4 to the computer using USB cable while it is in the Download Mode. Wait until Odin detects the device. When the device is connected successfully, the ID: COM box will turn blue with the COM port number. Additionally, the successful connected will be indicated by a message saying Added.

Note: If the Added message does not appear, then try re-install USB drivers or changing the port on the computer.

Step 7: Choose the following files in Odin from extracted I9500XXUBMG9 firmware folder by using respective checkboxes:
  • Select the PDA checkbox, and choose the file named .tar or .md5.
  • Click the Phone checkbox, and choose the file with 'modem' in its name (ignore if there is no such file)
  • Click the CSC checkbox, and select the file with 'csc' in its name (ignore if such file is missing)
  • Choose the PIT checkbox, and choose the .pit file. Use only the file obtained during extracting in step 1 above, otherwise ignore it.
Step 8: In Odin, enable Auto Reboot and F. Reset Time checkboxes. Also, ensure the Re-Partition checkbox is chosen only if a .pit file was chosen in the previous step.
Step 9: Verify everything suggested in Step 7 and Step 8 is done correctly. Then hit the START button to begin the installation process.
Step 10: Once the installation process is completed, your phone will restart and soon you will see a PASS message with green background in the left-most box at the very top of the Odin. You can now unplug the USB cable to disconnect your device from computer.

Samsung Galaxy S4 I9500 should be now updated with official Android 4.2.2 XXUBMG9 Jelly Bean. Head over to Settings >> About Phone to verify the software version running on the device.

Note: If Galaxy S4 I9500 stuck at booting animation after Step 10 then go to recovery mode (press and hold the Volume Up, Home and Power buttons together) and perform Wipe data/Factory Reset and Wipe Cache Partition task before selecting reboot system now function. In recovery mode use Volume keys to navigate between options and Power key to select the option. Please note, performing wiping task will erase your device internal memory data and not external SD card data.

Baca Selengkapnya ....

How to Root Galaxy S4 (Verizon) SCH-I545 on Android 4.2.2 VRUAME7 Jelly Bean Firmware

Posted by Unknown 0 komentar

Samsung Galaxy S4 (Verizon) SCH-I545 users who have already updated their devices with Android 4.2.2 VRUAME7 Jelly Bean, may root their devices using the tutorial below.

This tutorial uses Root Exploit package created by Recognized XDA-Developers, DooMLoRD, which later modified by PWM978 to make it work on Galaxy S4 (Verizon) SCH-I545. The Root Exploit package allowing Galaxy S4 users to root their devices easily without having to wipe the device or flash a full prerooted factory image. It's completely supports Android 4.2.2 Jelly Bean with firmware build number I545VRUAME7.

Disclaimer: Rooting voids the warranty of your device. We and the developer of this rooting procedures shall not be held responsible if any undesirable outcomes may happen to your device. use of this root guide is solely at your own risk!

Pre-requisites
1. Install USB Drivers for Samsung Galaxy S4 on the computer.
2. Install Android Terminal Emulator on your device.
3. Enable USB Debugging Mode on the phone by navigating to Settings >> Developer Options.
4. Make a backup of all your important data before following the guide.
5. Ensure the battery of the phone is charged more than 80 per cent.
6. The Root Exploit package works only on Samsung Galaxy S4 (Verizon) SCH-I545 running on Android 4.2.2 VRUAME7 Jelly Bean firmware. Applying this to any incorrect variant might brick the device. Verify the model number of the Galaxy S4 by navigating to Settings >> About Phone.

File Required
1. Root Exploit (Mirror Link) for Galaxy S4 (Verizon) SCH-I545 (RootforVZWS4.zip)

Steps to Root Galaxy S4 (Verizon) SCH-I545 Running on Android 4.2.2 VRUAME7 Jelly Bean Firmware
Step 1: Extract Root Exploit package using winrar/7zip/winzip or any other extracting tool.
Step 2: Insert a microSD card into your device. Make sure it is formatted as exFAT (not FAT32).

Note: If you have a 64GB microSD card you can use your phone to format it as exFAT by default directly from the Storage settings. However, if you have anything less than 64GB microSD card you may have to use the computer to format it manually as exFAT. Remember, if your microSD card is not formatted as exFAT you will see "permission denied" errors when running the exploit.

Step 3: Connect the Galaxy S4 to the computer using USB cable.
Step 4: Copy all files and folders from the Root Exploit package directly onto the root of your microSD card (nowhere else).
Step 5: Open the Android Terminal Emulator app on your phone, then run the following commands:

cd /mnt/extSdCard
./pwn
./script.sh

Note: After running the second command you should have seen your $ change to a # meaning you have root access. The third command is required to make this root access permanent.

Step 6: Once all commands are completed, close the Android Terminal Emulator app and check if SuperSU has any update in the Google Play Store.
Step 7: Open SuperSU app and let the binary update itself to the latest (if any updates are available).
Step 8: Once completed, reboot your device and confirm you still have root access.

Galaxy S4 (Verizon) SCH-I545 running on Android 4.2.2 VRUAME7 Jelly Bean firmware is now rooted successfully.

Thank's to all fellas at XDA who first tried out this rooting technique. This method was originally posted via XDA-Developer original thread.

Baca Selengkapnya ....

How to Root Galaxy S4 (AT&T) SGH-I337 on Android 4.2.2 UCUAMF3 Jelly Bean Firmware

Posted by Unknown 0 komentar

An official Android 4.2.2 Jelly Bean Over-The-Air (OTA) update with build number I337UCUAMF3 has been released for the AT&T subscribers of the Samsung Galaxy S4 (SGH-I337).

Galaxy S4 (AT&T) SGH-I337 users who have already updated their devices with Android 4.2.2 UCUAMF3 Jelly Bean, may root their devices using the tutorial below.

This tutorial uses the Root Exploit package created by Recognized XDA-Developers, DooMLoRD, which later adapted by Jortex to make it work on Galaxy S4 (AT&T) SGH-I337. The Root Exploit package allowing Galaxy S4 users to root their devices easily without having to wipe the device or flash a full prerooted factory image. It's completely supports Android 4.2.2 Jelly Bean with firmware build number I337UCUAMF3.

Disclaimer: Rooting voids the warranty of your device. We and the developer of this rooting procedures shall not be held responsible if any undesirable outcomes may happen to your device. use of this root guide is solely at your own risk!

Pre-requisites
1. Install USB Drivers for Samsung Galaxy S4 on the computer.
2. Install Android Terminal Emulator on your device.
3. Enable USB Debugging Mode on the phone by navigating to Settings >> Developer Options.
4. Make a backup of all your important data before following the guide.
5. Ensure the battery of the phone is charged more than 80 per cent.
6. The Root Exploit package works only on Samsung Galaxy S4 (AT&T) SGH-I337 running on Android 4.2.2 UCUAMF3 Jelly Bean firmware. Applying this to any incorrect variant might brick the device. Verify the model number of the Galaxy S4 by navigating to Settings >> About Phone.

File Required
1. Root Exploit (Mirror Link) for Galaxy S4 (AT&T) SGH-I337 (Root_for_ATTSG4_FM3.rar)

Steps to Root Galaxy S4 (AT&T) SGH-I337 Running on Android 4.2.2 UCUAMF3 Jelly Bean Firmware
Step 1: Extract Root Exploit package using winrar/7zip/winzip or any other extracting tool.
Step 2: Insert a microSD card into your device. Make sure it is formatted as exFAT (not FAT32).

Note: If you have a 64GB microSD card you can use your phone to format it as exFAT by default directly from the Storage settings. However, if you have anything less than 64GB microSD card you may have to use the computer to format it manually as exFAT. Remember, if your microSD card is not formatted as exFAT you will see "permission denied" errors when running the exploit.

Step 3: Connect the Galaxy S4 to the computer using USB cable.
Step 4: Copy all files and folders from the Root Exploit package directly onto the root of your microSD card (nowhere else).
Step 5: Open the Android Terminal Emulator app on your phone, then run the following commands:

cd /mnt/extSdCard
./pwn
./script.sh

Note: After running the second command you should have seen your $ change to a # meaning you have root access. The third command is required to make this root access permanent.

Step 6: Once all commands are completed, close the Android Terminal Emulator app and check if SuperSU has any update in the Google Play Store.
Step 7: Open SuperSU app and let the binary update itself to the latest (if any updates are available).
Step 8: Once completed, reboot your device and confirm you still have root access.

Galaxy S4 (AT&T) SGH-I337 running on Android 4.2.2 UCUAMF3 Jelly Bean firmware is now rooted successfully.

Thank's to all fellas at XDA who first tried out this rooting technique. This method was originally posted via XDA-Developer original thread.

Baca Selengkapnya ....

How to Root Galaxy S4 I9500 on Android 4.2.2 XXUBMG9 Jelly Bean Firmware

Posted by Unknown 0 komentar

A new software update based on Android 4.2.2 Jelly Bean with firmware build number I9500XXUBMG9 has been rolled out on Samsung Galaxy S4 with model number GT-I9500.

Samsung Galaxy S4 I9500 users who have already updated their devices with Android 4.2.2 XXUBMG9 Jelly Bean, may root their devices using the tutorial below.

This tutorial uses CF-Auto-Root file released by recognised XDA Developers, Chainfire. The CF-Auto-Root file allowing Galaxy S4 users to root their devices easily without depending on the firmware. It completely supports Android 4.2.2 Jelly Bean and future firmware as well. Head over to the CF-Auto-Root main thread to learn more about the root method.

Disclaimer: Rooting voids the warranty of your device. We and the developer of this rooting procedures shall not be held responsible if any undesirable outcomes may happen to your device. use of this root guide is solely at your own risk!

Pre-requisites
1. Install USB Drivers for Samsung Galaxy S4 on the computer.
2. Enable USB Debugging Mode on the phone by navigating to Settings >> Developer Options.
3. Make a backup of all your important data before following the guide.
4. The Galaxy S4 should be factory unlocked and not locked to any particular carrier.
5. Ensure the battery of the phone is charged more than 80 percent.
6. The CF-Auto-Root file works only on Samsung Galaxy S4 I9500. Applying this to any incorrect variant might brick the device. Verify the model number of the Galaxy S4 by navigating to Settings >> About Phone.

File Required
1. CF-Auto-Root for Galaxy S4 I9500 (CF-Auto-Root-ja3g-ja3gxx-gti9500.zip)
2. Odin 3.07

Steps to Root Galaxy S4 I9500 Running on Android 4.2.2 XXUBMG9 Jelly Bean Firmware
Step 1: Extract CF-Auto-Root and Odin 3.07 files using winrar/7zip/winzip or any other extracting tool.
Step 2: Switch off the Galaxy S4. Then boot the device into Download Mode by pressing and holding Volume Down, Home and Power buttons together until a construction Android robot icon with a warning triangle appears on screen. Now press the Volume Up button to enter Download Mode.
Step 3: Launch Odin on the computer as an Administrator.
Step 4: Connect the Galaxy S4 to the computer using USB cable while it is in the Download Mode. Wait until Odin detects the device. When the device is connected successfully, the ID: COM box will turn blue with the COM port number. Additionally, the successful connected will be indicated by a message saying Added.

Note: If the Added message does not appear, then try re-install USB drivers or changing the port on the computer.

Step 5: In Odin, click the PDA button and select the CF-Auto-Root-ja3g-ja3gxx-gti9500.tar.md5 file.
Step 6: Verify that Auto Reboot and F.Reset Time checkboxes are selected in Odin. Also, ensure the Re-Partition option is not selected.
Step 7: Double-check and click Start in Odin. The installation process will now begin.
Step 8: Once the installation process is completed, your phone will restart and soon you will see a PASS message with green background in the left-most box at the very top of the Odin. You can now unplug the USB cable to disconnect your device from computer.

Samsung Galaxy S4 I9500 running on Android 4.2.2 XXUBMG9 Jelly Bean firmware is now rooted successfully. You can now install any app that requires root permission. Verify the root status of the device by downloading Root Checker app from Google Play Store.

Thank's to all fellas at XDA who first tried out this rooting technique. This method was originally posted via XDA-Developers original thread.

Baca Selengkapnya ....
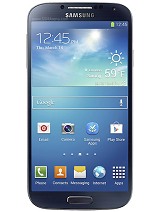
How to Root Galaxy S4 I9505G on Android 4.3 Jelly Bean Firmware

Posted by Unknown 0 komentar

Google has released the official Android 4.3 Jelly Bean update for the Google Play Edition of the Samsung Galaxy S4 (GT-I9505G).

Samsung Galaxy S4 I9505G users who have already updated their devices with Android 4.3 Jelly Bean, may root their devices using the tutorial below.

This tutorial uses CF-Auto-Root file released by recognised XDA Developers, Chainfire. The CF-Auto-Root file allowing Galaxy S4 users to root their devices easily without depending on the firmware. It completely supports Android 4.3 Jelly Bean and future firmware as well. Head over to the CF-Auto-Root main thread to learn more about the root method.

Disclaimer: Rooting voids the warranty of your device. We and the developer of this rooting procedures shall not be held responsible if any undesirable outcomes may happen to your device. use of this root guide is solely at your own risk!

Pre-requisites
1. Install USB Drivers for Samsung Galaxy S4 on the computer.
2. Enable USB Debugging Mode on the phone by navigating to Settings >> Developer Options.
3. Make a backup of all your important data before following the guide.
4. The Galaxy S4 should be factory unlocked and not locked to any particular carrier.
5. Ensure the battery of the phone is charged more than 80 percent.
6. The CF-Auto-Root file works only on Samsung Galaxy S4 I9505G. Applying this to any incorrect variant might brick the device. Verify the model number of the Galaxy S4 by navigating to Settings >> About Phone.

File Required
1. CF-Auto-Root for Galaxy S4 I9505G (CF-Auto-Root-jgedlte-jgedlteue-gti9505g.zip)
2. Odin 3.07

Steps to Root Galaxy S4 I9505G Running on Android 4.3 Jelly Bean Firmware
Step 1: Extract CF-Auto-Root and Odin 3.07 files using winrar/7zip/winzip or any other extracting tool.
Step 2: Switch off the Galaxy S4. Then boot the device into Download Mode by pressing and holding Volume Down, Home and Power buttons together until a construction Android robot icon with a warning triangle appears on screen. Now press the Volume Up button to enter Download Mode.
Step 3: Launch Odin on the computer as an Administrator.
Step 4: Connect the Galaxy S4 to the computer using USB cable while it is in the Download Mode. Wait until Odin detects the device. When the device is connected successfully, the ID: COM box will turn to light blue with the COM port number. Additionally, the successful connected will be indicated by a message saying Added.

Note: If the Added message does not appear, then try re-install USB drivers or changing the port on the computer.

Step 5: In Odin, click the PDA button and select the CF-Auto-Root-jgedlte-jgedlteue-gti9505g.tar.md5 file.
Step 6: Verify that Auto Reboot and F.Reset Time checkboxes are selected in Odin. Also, ensure the Re-Partition option is not selected.
Step 7: Double-check and click Start in Odin. The installation process will now begin.
Step 8: Once the installation process is completed, your phone will restart and soon you will see a PASS message with green background in the left-most box at the very top of the Odin. You can now unplug the USB cable to disconnect your device from computer.

Samsung Galaxy S4 I9505G running on Android 4.3 Jelly Bean firmware is now rooted successfully. You can now install any app that requires root permission. Verify the root status of the device by downloading Root Checker app from Google Play Store.

Thank's to all fellas at XDA who first tried out this rooting technique. This method was originally posted via XDA-Developers original thread.

Baca Selengkapnya ....

How to Root Galaxy S4 I9505 on Android 4.2.2 XXUDMH8 Jelly Bean Firmware

Posted by Unknown 0 komentar

Samsung has rolled out the Android 4.2.2 Jelly Bean update with firmware build number I9505XXUDMH8 for the LTE version of Galaxy S4 with model number GT-I9505. The new official firmware is currently available in UK as an Over-The-Air (OTA) update as well as through Samsung KIES.

Samsung Galaxy S4 I9505 users who have already updated their devices with Android 4.2.2 XXUDMH8 Jelly Bean, may root their devices using the tutorial below.

This tutorial uses CF-Auto-Root file released by recognised XDA Developers, Chainfire. The CF-Auto-Root file allowing Galaxy S4 users to root their devices easily without depending on the firmware. It completely supports Android 4.2.2 Jelly Bean and future firmware as well. Head over to the CF-Auto-Root main thread to learn more about the root method.

Disclaimer: Rooting voids the warranty of your device. We and the developer of this rooting procedures shall not be held responsible if any undesirable outcomes may happen to your device. use of this root guide is solely at your own risk!

Pre-requisites
1. Install USB Drivers for Samsung Galaxy S4 on the computer.
2. Enable USB Debugging Mode on the phone by navigating to Settings >> Developer Options.
3. Make a backup of all your important data before following the guide.
4. The Galaxy S4 should be factory unlocked and not locked to any particular carrier.
5. Ensure the battery of the phone is charged more than 80 percent.
6. The CF-Auto-Root file works only on Samsung Galaxy S4 I9505. Applying this to any incorrect variant might brick the device. Verify the model number of the Galaxy S4 by navigating to Settings >> About Phone.

File Required
1. CF-Auto-Root for Galaxy S4 I9505 (CF-Auto-Root-jflte-jfltexx-gti9505.zip)
2. Odin 3.07

Steps to Root Galaxy S4 I9505 Running on Android 4.2.2 XXUDMH8 Jelly Bean Firmware
Step 1: Extract CF-Auto-Root and Odin 3.07 files using winrar/7zip/winzip or any other extracting tool.
Step 2: Switch off the Galaxy S4. Then boot the device into Download Mode by pressing and holding Volume Down, Home and Power buttons together until a construction Android robot icon with a warning triangle appears on screen. Now press the Volume Up button to enter Download Mode.
Step 3: Launch Odin on the computer as an Administrator.
Step 4: Connect the Galaxy S4 to the computer using USB cable while it is in the Download Mode. Wait until Odin detects the device. When the device is connected successfully, the ID: COM box will turn to light blue with the COM port number. Additionally, the successful connected will be indicated by a message saying Added.

Note: If the Added message does not appear, then try re-install USB drivers or changing the port on the computer.

Step 5: In Odin, click the PDA button and select the CF-Auto-Root-jflte-jfltexx-gti9505.tar.md5 file.
Step 6: Verify that Auto Reboot and F.Reset Time checkboxes are selected in Odin. Also, ensure the Re-Partition option is not selected.
Step 7: Double-check and click Start in Odin. The installation process will now begin.
Step 8: Once the installation process is completed, your phone will restart and soon you will see a PASS message with green background in the left-most box at the very top of the Odin. You can now unplug the USB cable to disconnect your device from computer.

Samsung Galaxy S4 I9505 running on Android 4.2.2 XXUDMH8 Jelly Bean firmware is now rooted successfully. You can now install any app that requires root permission. Verify the root status of the device by downloading Root Checker app from Google Play Store.

Thank's to all fellas at XDA who first tried out this rooting technique. This method was originally posted via XDA-Developers original thread.

Baca Selengkapnya ....

How to Update Galaxy S4 I9505 with Android 4.2.2 XXUDMH8 Jelly Bean Official Firmware

Posted by Unknown 0 komentar

Samsung has just started to push a new software update for the LTE version of Galaxy S4 with model number GT-I9505. The new software update is still based on Android 4.2.2 Jelly Bean and now available for download in UK as an Over-The-Air (OTA) update as well as through Samsung KIES.

Firmware details
PDA: I9505XXUDMH8
CSC: I9505OXXDMHA
MODEM: I9505XXUDMH8
Version: Android 4.2.2
Built date: Aug 21, 2013
Regions: United Kingdom

Samsung Galaxy S4 I9505 users who missed the OTA update notification or unable to access the update over Samsung KIES, may follow our step-by-step guide to install the update manually.

Pre-requisites
1. Install USB Drivers for Samsung Galaxy S4 on the computer.
2. Enable USB Debugging Mode on the phone by navigating to Settings >> Developer Options.
3. Make a backup of all your important data before following the guide.
4. The Galaxy S4 should be factory unlocked and not locked to any particular carrier.
5. Ensure the battery of the phone is charged more than 80 percent.
6. The Android 4.2.2 XXUDMH8 Jelly Bean firmware is compatible only with Samsung Galaxy S4 I9505. Applying these to any incorrect variant might brick the device. Verify the model number of the Galaxy S4 by navigating to Settings >> About Phone.

File Required
1. Android 4.2.2 XXUDMH8 Jelly Bean Firmware (Mirror Link) for Samsung Galaxy S4 I9505
2. Odin 3.07

Steps to Update Galaxy S4 I9505 with Android 4.2.2 XXUDMH8 Jelly Bean Firmware
Step 1: Extract Firmware zip file using winrar/7zip/winzip or any other extracting tool, you will get a .tar.md5 file and some other files.
Step 2: Extract Odin zip file and you will get Odin3 v3.07.exe along with few other files.
Step 3: Switch off the Galaxy S4.
Step 4: Boot the device into Download Mode by pressing and holding Volume Down, Home and Power buttons together until a construction Android robot icon with a warning triangle appears on screen. Now press the Volume Up button to enter Download Mode.
Step 5: Run Odin on the computer as an Administrator.
Step 6: Connect the Galaxy S4 to the computer using USB cable while it is in the Download Mode. Wait until Odin detects the device. When the device is connected successfully, the ID: COM box will turn to light blue with the COM port number. Additionally, the successful connected will be indicated by a message saying Added.

Note: If the Added message does not appear, then try re-install USB drivers or changing the port on the computer.

Step 7: Choose the following files in Odin from extracted I9505XXUDMH8 firmware folder by using respective checkboxes:
  • Select the PDA checkbox, and choose the file named .tar or .md5.
  • Click the Phone checkbox, and choose the file with 'modem' in its name (ignore if there is no such file)
  • Click the CSC checkbox, and select the file with 'csc' in its name (ignore if such file is missing)
  • Choose the PIT checkbox, and choose the .pit file. Use only the file obtained during extracting in step 1 above, otherwise ignore it.
Step 8: In Odin, enable Auto Reboot and F. Reset Time checkboxes. Also, ensure the Re-Partition checkbox is chosen only if a .pit file was chosen in the previous step.
Step 9: Verify everything suggested in Step 7 and Step 8 is done correctly. Then hit the Start button to begin the installation process.
Step 10: Once the installation process is completed, your phone will restart and soon you will see a PASS message with green background in the left-most box at the very top of the Odin. You can now unplug the USB cable to disconnect your device from computer.

Samsung Galaxy S4 I9505 should be now updated with official Android 4.2.2 XXUDMH8 Jelly Bean. Head over to Settings >> About Phone to verify the software version running on the device.

Note: If Galaxy S4 I9505 stuck at booting animation after Step 10 then go to recovery mode (press and hold the Volume Up, Home and Power buttons together) and perform Wipe data/Factory Reset and Wipe Cache Partition task before selecting reboot system now function. In recovery mode use Volume keys to navigate between options and Power key to select the option. Please note, performing wiping task will erase your device internal memory data and not external SD card data.

Baca Selengkapnya ....

How to Update Galaxy S4 (LTE) I9505 with Leaked Android 4.3 XXUEMI8 Jelly Bean Firmware

Posted by Unknown 0 komentar

An Android 4.3 Jelly Bean test firmware with firmware build number I9505XXUEMI8 has been leaked for the LTE version of Samsung Galaxy S4 with model number GT-I9505.

Firmware details
PDA: I9505XXUEMI8
CSC: I9505OXAEMI8
MODEM: I9505XXUEMI8
Version: Android 4.3
Build date: Sep 20, 2013
Regions: Open Europe

Samsung Galaxy S4 (LTE) I9505 users can now update their devices with the leaked version of Android 4.3 Jelly Bean firmware by following the tutorial below.

Pre-requisites
1. Install USB Drivers for Samsung Galaxy S4 on the computer.
2. Enable USB Debugging Mode on the device by navigating to Settings >> Developer Options.
3. Make a backup of all your important data before following the guide.
4. The Galaxy S4 should be factory unlocked and not locked to any particular carrier.
5. Ensure the battery of the device is charged more than 80 percent.
6. The leaked Android 4.3 XXUEMI8 Jelly Bean firmware is compatible only with the LTE version of Samsung Galaxy S4 with model number GT-I9505. Applying this to any incorrect variant might brick the device. Verify the model number of the Galaxy S4 by navigating to Settings >> About Phone.

File Required
1. Android 4.3 XXUEMI8 Jelly Bean Firmware for Galaxy S4 (LTE) I9505
2. Odin 3.09

Steps to Update Galaxy S4 (LTE) I9505 with Android 4.3 XXUEMI8 Jelly Bean Firmware
Step 1: Extract Firmware zip file using winrar/7zip/winzip or any other extracting tool, you will get a .tar.md5 file and some other files.
Step 2: Extract Odin zip file and you will get Odin3 v3.09.exe along with few other files.
Step 3: Switch off Galaxy S4.
Step 4: Boot the device into Download Mode by pressing and holding HomeVolume Down and Power buttons together until a construction Android robot icon with a warning triangle appears on screen. Now press the Volume Up button to enter Download Mode.
Step 5: Run Odin on the computer as an Administrator.
Step 6: Connect the Galaxy S4 to the computer using USB cable while it is in the Download Mode. Wait until Odin detects the device. When the device is connected successfully, the ID: COM box will turn to light blue with the COM port number. Additionally, the successful connected will be indicated by a message saying Added.

Note: If the Added message does not appear, then try re-install USB drivers or changing the port on the computer.

Step 7: Select the following files in Odin from extracted I9505XXUEMI8 firmware folder:
  • Click the BL button and select file with BL in its name.
  • Click the AP button and select file with AP in its name.
  • Click the CP button and select file with CP in its name.
  • Click the CSC button and select file with CSC in its name.
Step 8: In Odin, enable Auto Reboot and F. Reset Time checkboxes. Also, ensure the Re-Partition option is NOT selected.
Step 9: Verify everything suggested in Step 7 and Step 8 is done correctly. Then hit the Start button to begin the installation process.
Step 10: Once the installation process is completed, your device will restart and soon you will see a PASS message with green background in the left-most box at the very top of the Odin. You can now unplug the USB cable to disconnect your device from the computer.

Samsung Galaxy S4 (LTE) I9505 should be now updated with leaked Android 4.3 XXUEMI8 Jelly Bean firmware. Head over to Settings >> About Phone to verify the software version running on the device.

Note: If Galaxy S4 (LTE) I9505 stuck at booting animation after Step 10 then go to recovery mode (press and hold the Home, Volume Up and Power buttons together) and perform Wipe data/Factory Reset and Wipe Cache Partition task before selecting reboot system now function. In recovery mode use Volume keys to navigate between options and Power key to select the option. Please note, performing wiping task will erase your device internal memory data and not external SD card data.

Source: SamMobile

Baca Selengkapnya ....

How to Root Galaxy S4 I9500 on Android 4.3 Jelly Bean Firmware

Posted by Unknown 0 komentar

The Exynos 5 octa-core variant of Samsung Galaxy S4 (GT-I9500) has received a new Android 4.3 Jelly Bean firmware. The new official firmware is currently available as an Over-The-Air (OTA) update as well as through Samsung KIES.

Samsung Galaxy S4 I9500 users who have already updated their devices with Android 4.3 Jelly Bean, may root their devices using the tutorial below.

This tutorial uses CF-Auto-Root file released by Elite Recognized XDA Developers, Chainfire. The CF-Auto-Root file allowing Galaxy S4 users to root their devices easily without depending on the firmware. It completely supports Android 4.3 Jelly Bean and future firmware as well. Head over to the CF-Auto-Root main thread to learn more about the root method.

Disclaimer: Rooting voids the warranty of your device. We and the developer of this rooting procedures shall not be held responsible if any undesirable outcomes may happen to your device. use of this root guide is solely at your own risk!

Pre-requisites
1. Install USB Drivers for Samsung Galaxy S4 on the computer.
2. Enable USB Debugging Mode on the phone by navigating to Settings >> Developer Options.
3. Make a backup of all your important data before following the guide.
4. The Galaxy S4 should be factory unlocked and not locked to any particular carrier.
5. Ensure the battery of the phone is charged more than 80 percent.
6. The CF-Auto-Root file works only on Samsung Galaxy S4 I9500. Applying this to any incorrect variant might brick the device. Verify the model number of the Galaxy S4 by navigating to Settings >> About Phone.

File Required
1. CF-Auto-Root for Galaxy S4 I9500 (CF-Auto-Root-ja3g-ja3gxx-gti9500.zip)
2. Odin 3.07

Steps to Root Galaxy S4 I9500 Running on Android 4.3 Jelly Bean Firmware
Step 1: Extract CF-Auto-Root and Odin 3.07 files using winrar/7zip/winzip or any other extracting tool.
Step 2: Switch off the Galaxy S4. Then boot the device into Download Mode by pressing and holding Volume Down, Home and Power buttons together until a construction Android robot icon with a warning triangle appears on screen. Now press the Volume Up button to enter Download Mode.
Step 3: Launch Odin on the computer as an Administrator.
Step 4: Connect the Galaxy S4 to the computer using USB cable while it is in the Download Mode. Wait until Odin detects the device. When the device is connected successfully, the ID: COM box will turn to light blue with the COM port number. Additionally, the successful connected will be indicated by a message saying Added.

Note: If the Added message does not appear, then try re-install USB drivers or changing the port on the computer.

Step 5: In Odin, click the PDA button and select the CF-Auto-Root-ja3g-ja3gxx-gti9500.tar.md5 file.
Step 6: Verify that Auto Reboot and F. Reset Time checkboxes are selected in Odin. Also, ensure the Re-Partition option is NOT selected.
Step 7: Double-check and click Start in Odin. The installation process will now begin.
Step 8: Once the installation process is completed, your phone will restart and soon you will see a PASS message with green background in the left-most box at the very top of the Odin. You can now unplug the USB cable to disconnect your device from computer.

Samsung Galaxy S4 I9500 running on Android 4.3 Jelly Bean firmware is now rooted successfully. You can now install any app that requires root permission. Verify the root status of the device by downloading Root Checker app from Google Play Store.

Thank's to all fellas at XDA who first tried out this rooting technique. This method was originally posted via XDA-Developers original thread.

Baca Selengkapnya ....

How to Root Galaxy S4 (LTE) I9505 on Android 4.3 Jelly Bean Firmware

Posted by Unknown 0 komentar

The LTE version of Samsung Galaxy S4 with model number GT-I9500 has officially received the Android 4.3 Jelly Bean update. The new official firmware is currently available as an Over-The-Air (OTA) update as well as through Samsung KIES.

Samsung Galaxy S4 I9505 users who have already updated their devices with Android 4.3 Jelly Bean, may root their devices using the tutorial below.

This tutorial uses CF-Auto-Root file released by Elite Recognized XDA Developers, Chainfire. The CF-Auto-Root file allowing Galaxy S4 users to root their devices easily without depending on the firmware. It completely supports Android 4.3 Jelly Bean and future firmware as well. Head over to the CF-Auto-Root main thread to learn more about the root method.

Disclaimer: Rooting voids the warranty of your device. We and the developer of this rooting procedures shall not be held responsible if any undesirable outcomes may happen to your device. use of this root guide is solely at your own risk!

Pre-requisites
1. Install USB Drivers for Samsung Galaxy S4 on the computer.
2. Enable USB Debugging Mode on the phone by navigating to Settings >> Developer Options.
3. Make a backup of all your important data before following the guide.
4. The Galaxy S4 should be factory unlocked and not locked to any particular carrier.
5. Ensure the battery of the phone is charged more than 80 percent.
6. The CF-Auto-Root file works only on Samsung Galaxy S4 I9505. Applying this to any incorrect variant might brick the device. Verify the model number of the Galaxy S4 by navigating to Settings >> About Phone.

File Required
1. CF-Auto-Root for Galaxy S4 I9505 (CF-Auto-Root-jflte-jfltexx-gti9505.zip)
2. Odin 3.07

Steps to Root Galaxy S4 I9505 Running on Android 4.3 Jelly Bean Firmware
Step 1: Extract CF-Auto-Root and Odin 3.07 files using winrar/7zip/winzip or any other extracting tool.
Step 2: Switch off the Galaxy S4. Then boot the device into Download Mode by pressing and holding Volume Down, Home and Power buttons together until a construction Android robot icon with a warning triangle appears on screen. Now press the Volume Up button to enter Download Mode.
Step 3: Launch Odin on the computer as an Administrator.
Step 4: Connect the Galaxy S4 to the computer using USB cable while it is in the Download Mode. Wait until Odin detects the device. When the device is connected successfully, the ID: COM box will turn to light blue with the COM port number. Additionally, the successful connected will be indicated by a message saying Added.

Note: If the Added message does not appear, then try re-install USB drivers or changing the port on the computer.

Step 5: In Odin, click the PDA button and select the CF-Auto-Root-jflte-jfltexx-gti9505.tar.md5 file.
Step 6: Verify that Auto Reboot and F. Reset Time checkboxes are selected in Odin. Also, ensure the Re-Partition option is not selected.
Step 7: Double-check and click Start in Odin. The installation process will now begin.
Step 8: Once the installation process is completed, your phone will restart and soon you will see a PASS message with green background in the left-most box at the very top of the Odin. You can now unplug the USB cable to disconnect your device from computer.

Samsung Galaxy S4 I9505 running on Android 4.3 Jelly Bean firmware is now rooted successfully. You can now install any app that requires root permission. Verify the root status of the device by downloading Root Checker app from Google Play Store.

Thank's to all fellas at XDA who first tried out this rooting technique. This method was originally posted via XDA-Developers original thread.

Baca Selengkapnya ....
Trik SEO Terbaru support Online Shop Baju Wanita - Original design by Bamz | Copyright of android qvga.